Sales and Delivery Setup
Table of contents
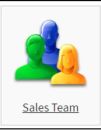
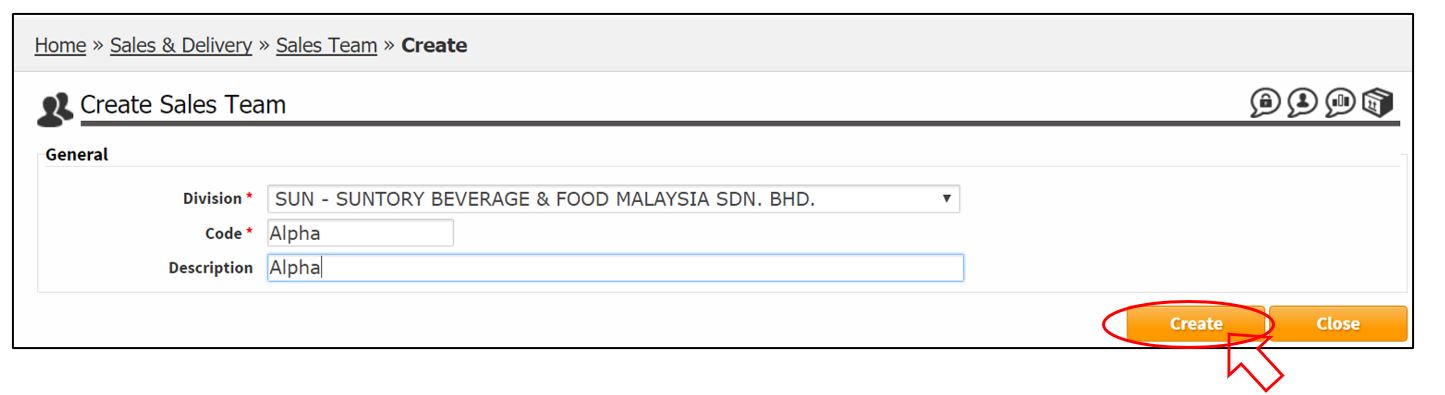
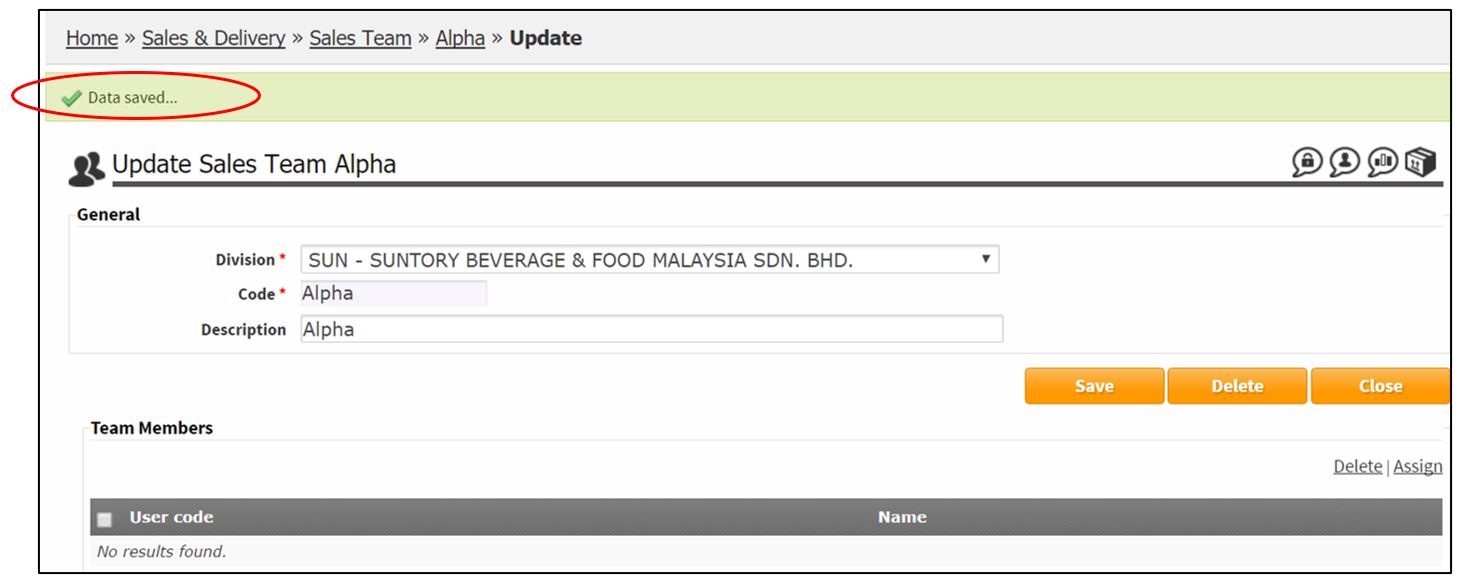
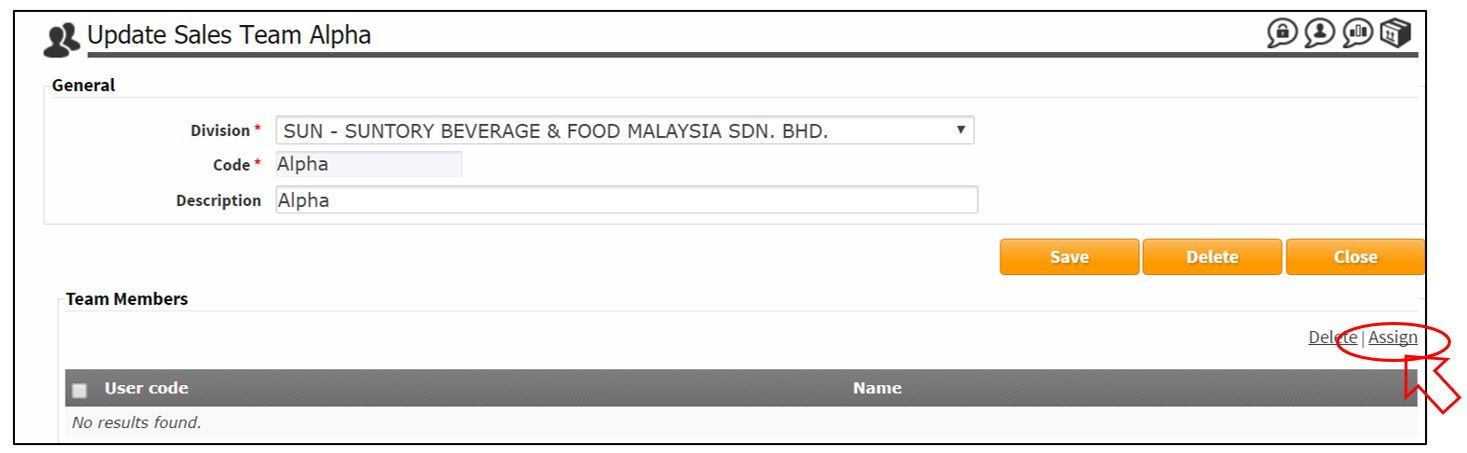
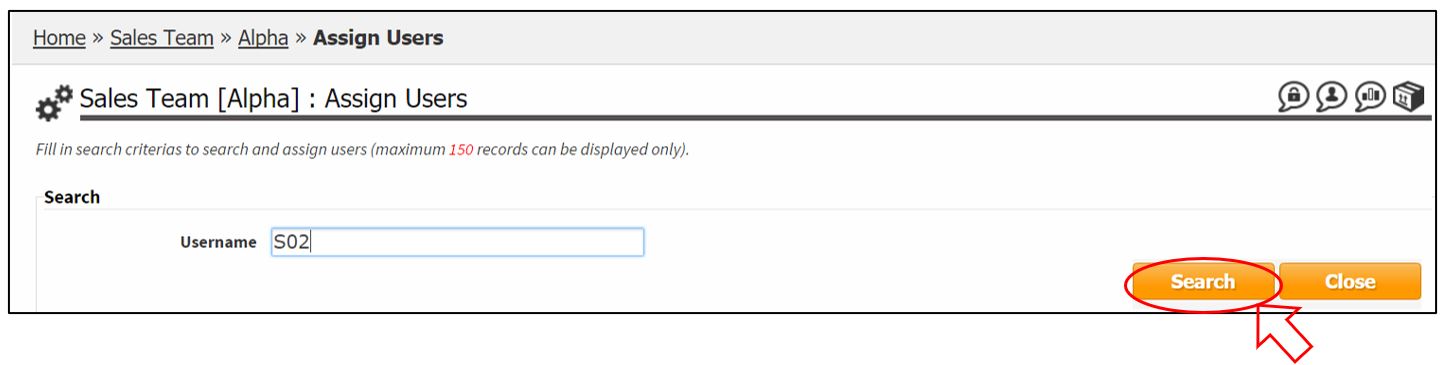
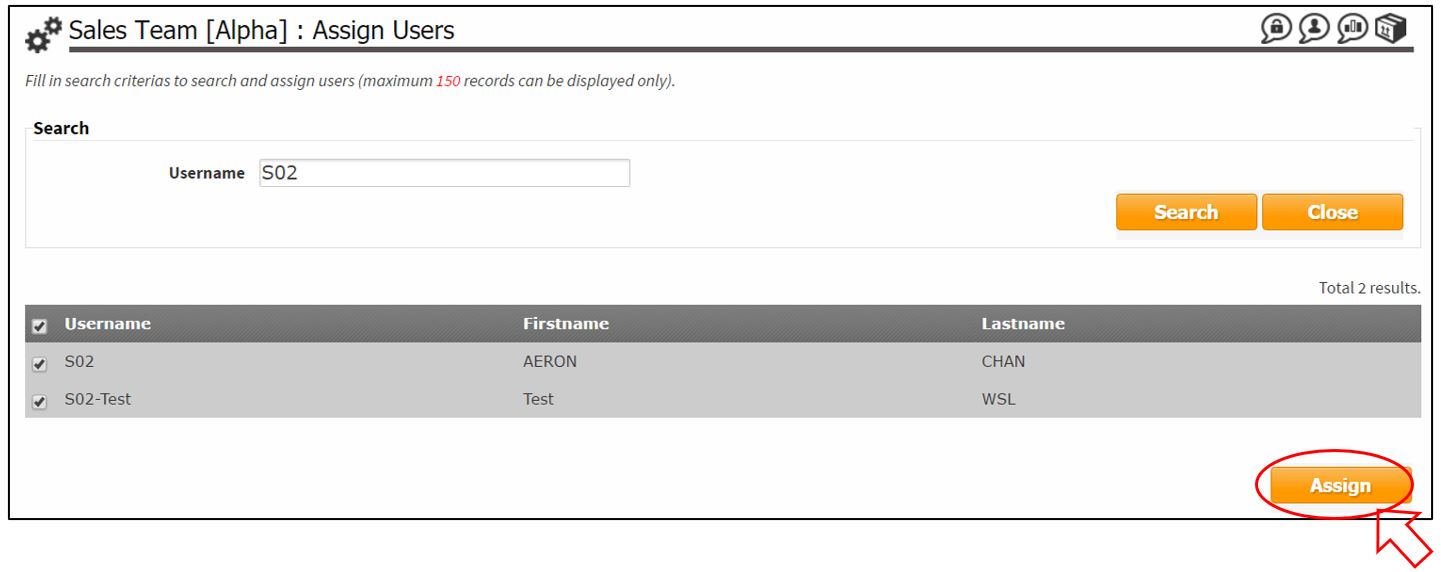
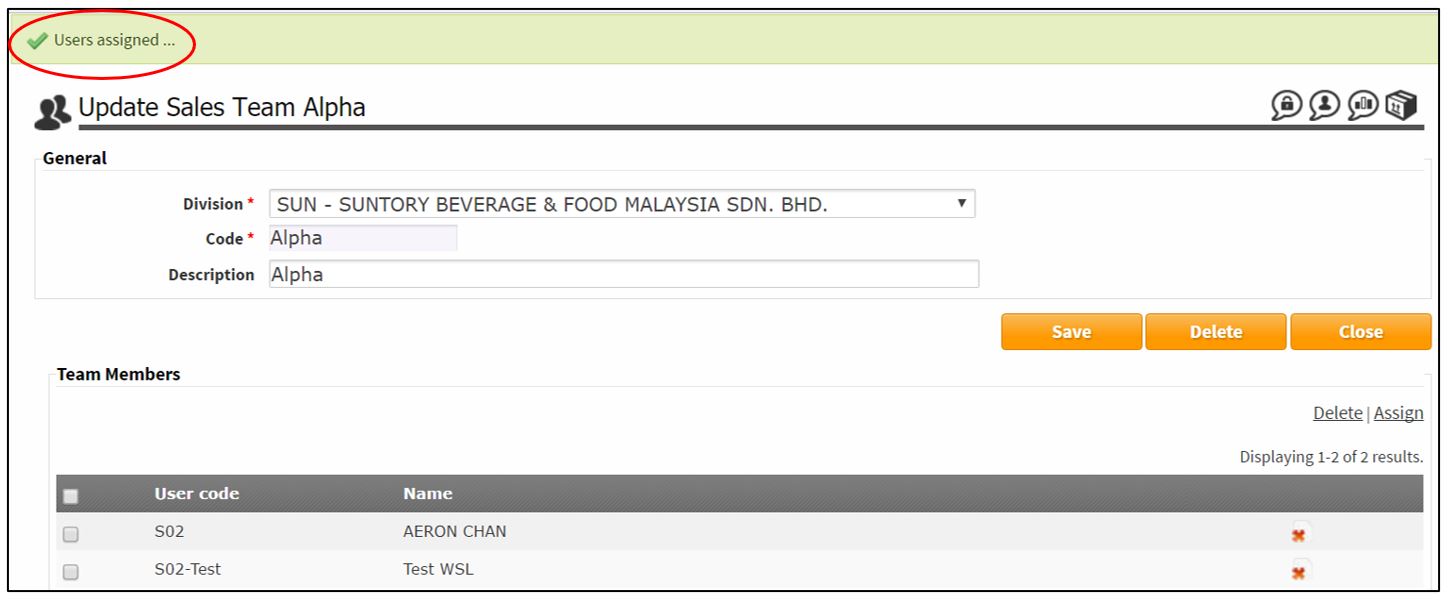
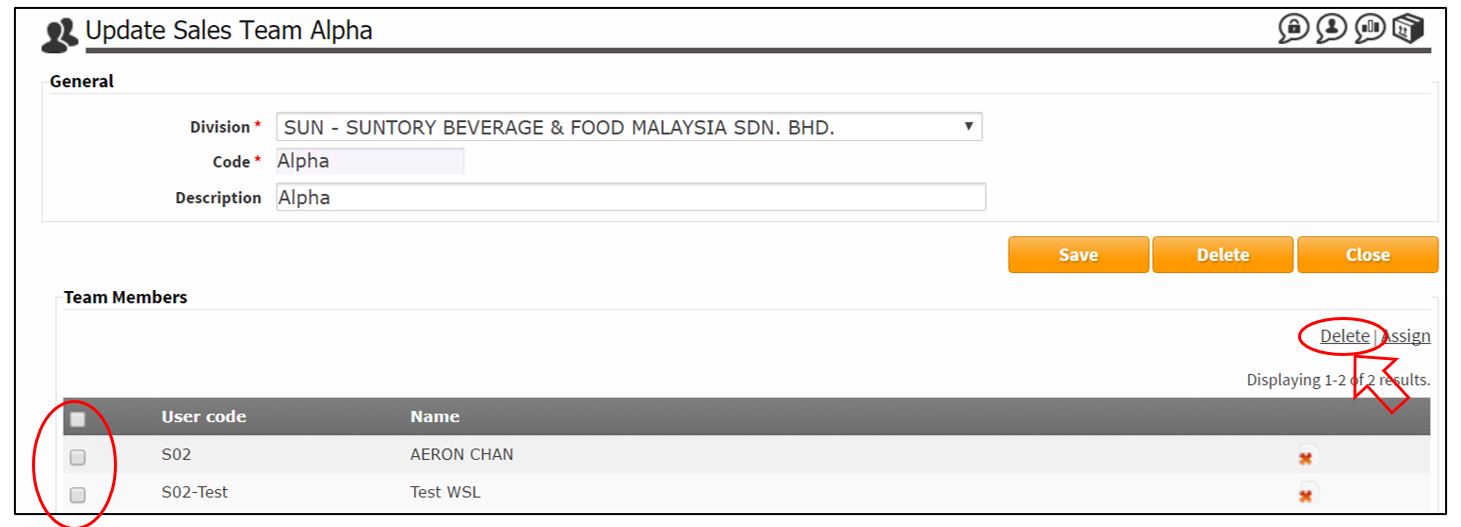
Sales Team
Route Plan
Price Group
Bulletin
Click on the Sales & Delivery Index.
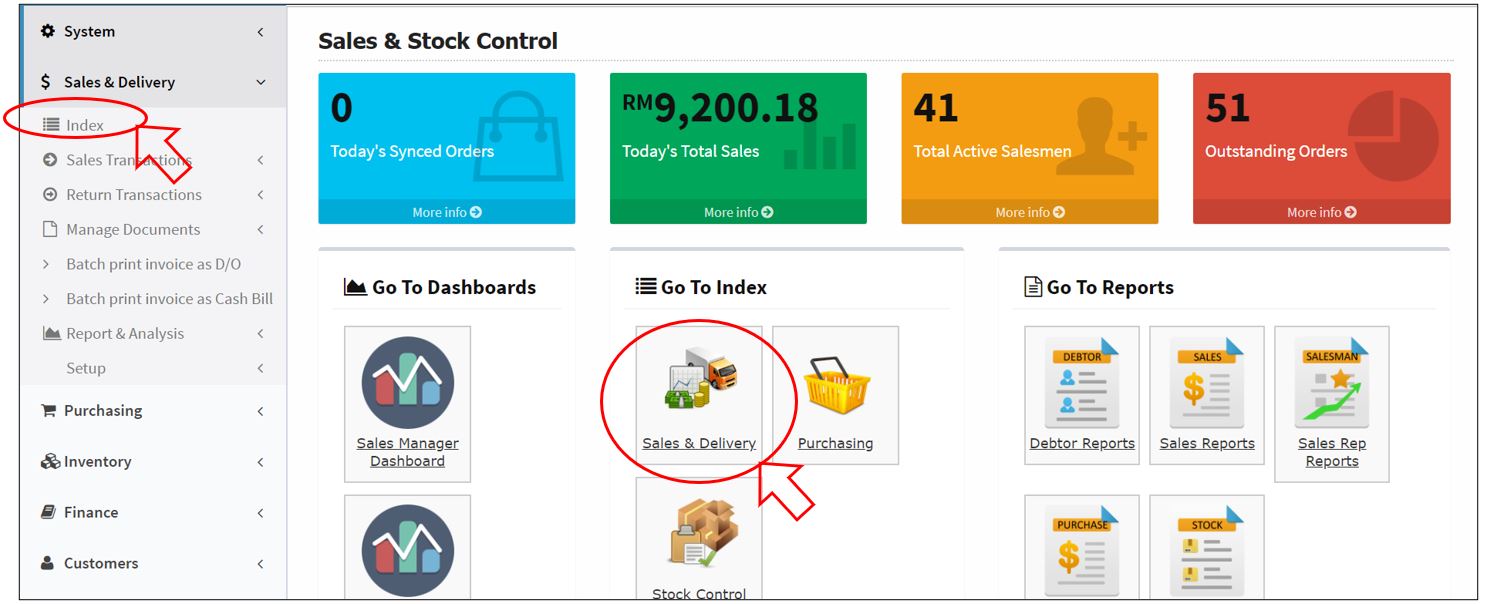
Sales Team

click here to close
Route Plan


Setup Price Group
Set the special selling price for specific customers.
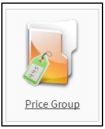
Click Create.
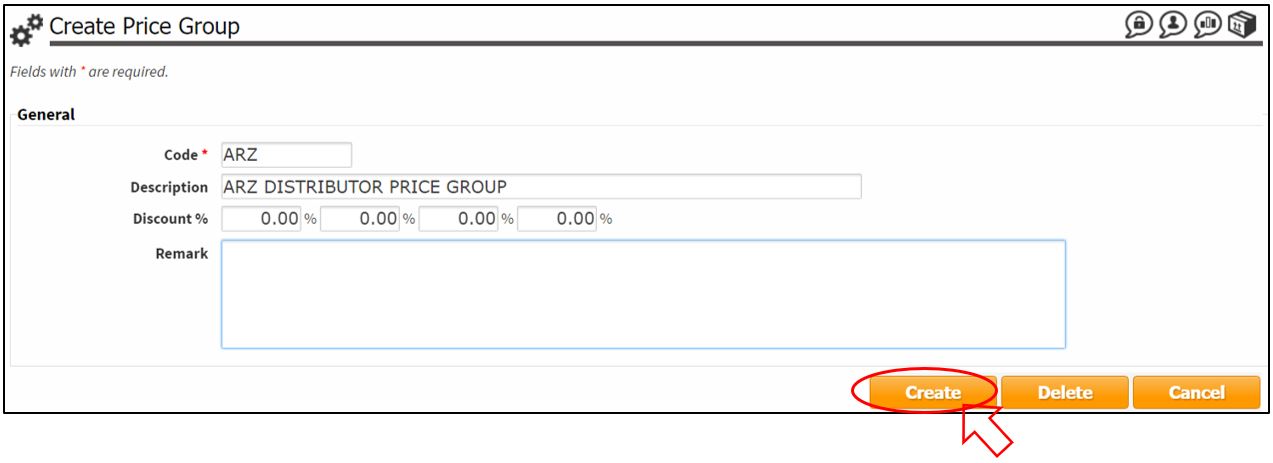
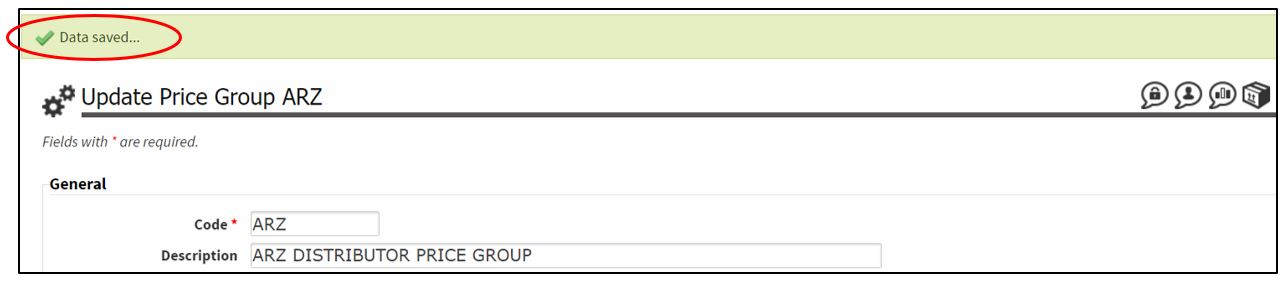
Fill in Price Group Code and Description.
Click Create button.
Message “Data saved…”
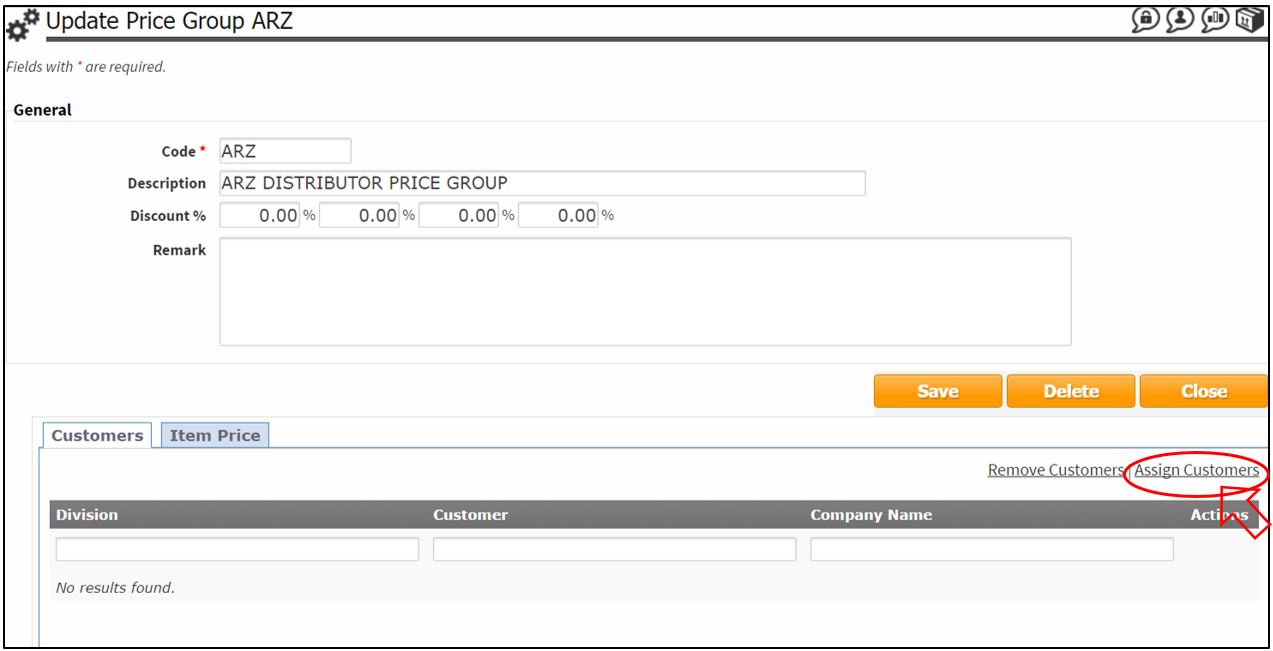
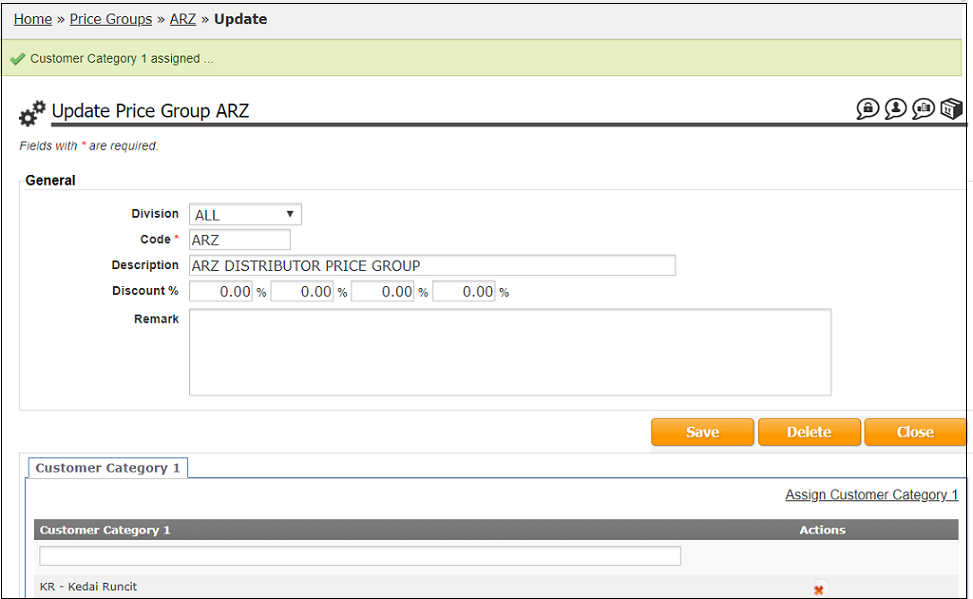
Assign Customers / Customer Category to Price Group
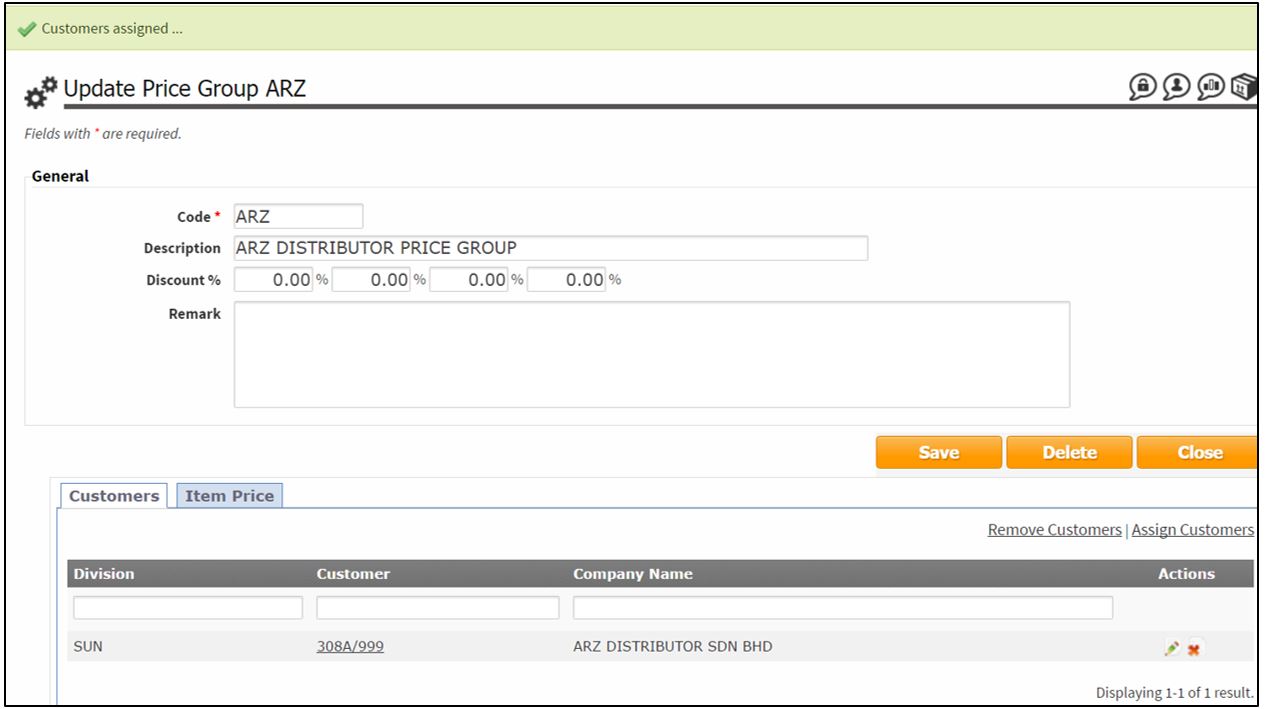
Under Customers section, click Assign Customers.
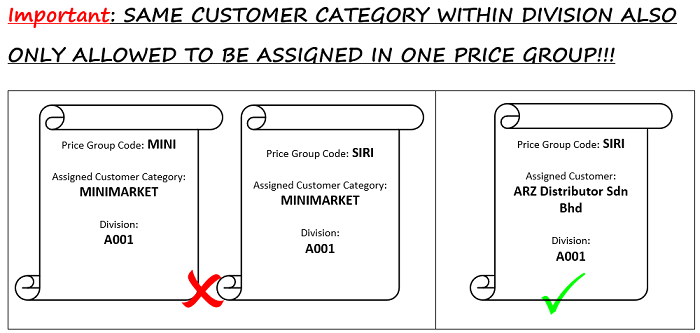
Price group setting can be done by customer or by customer category. Only 1 setting (by customer OR by customer category) to choose as default setting during system setup and this is not allowed to change in the future. So, user need to think carefully and decide which setting to choose as default setting for price group.

Assign Customers to Price Group
Under Customers section, click Assign Customers.
Search the customer.
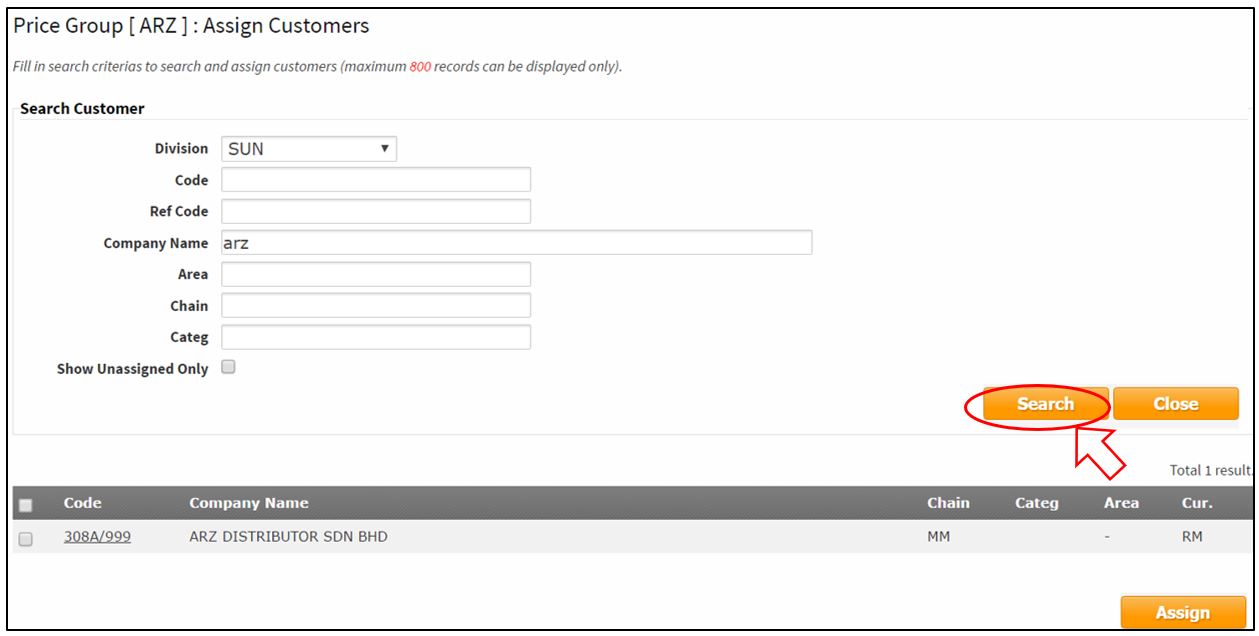
Tick the customer and then click Assign button.
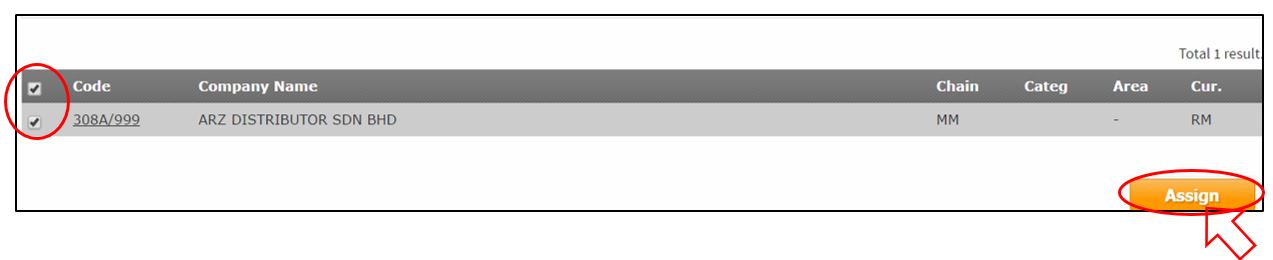
Message “Customers assigned…”
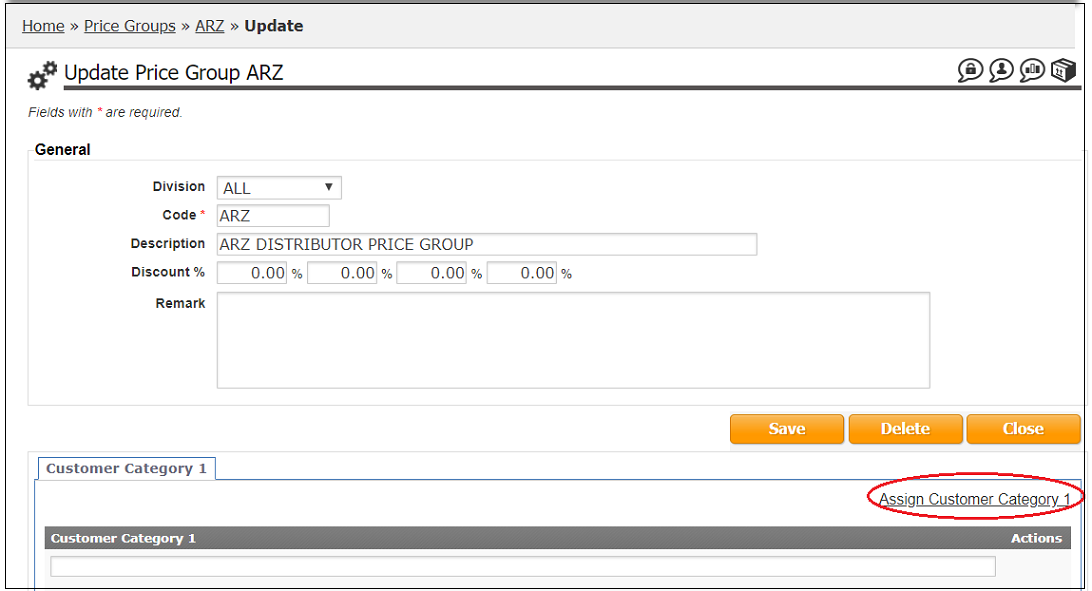
Assign Customer Category to Price Group
Under Customer Category section, click Assign Customer Category.
Search the customer category.
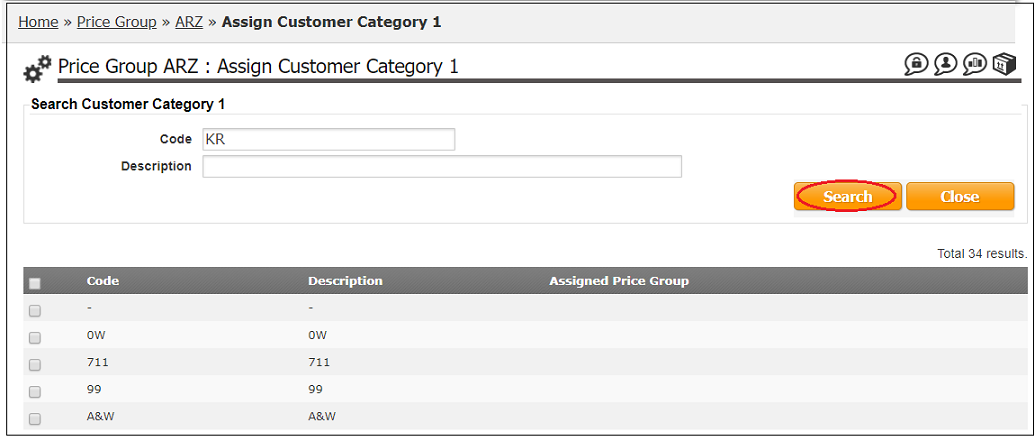
Tick to select customer category and then click Assign button.
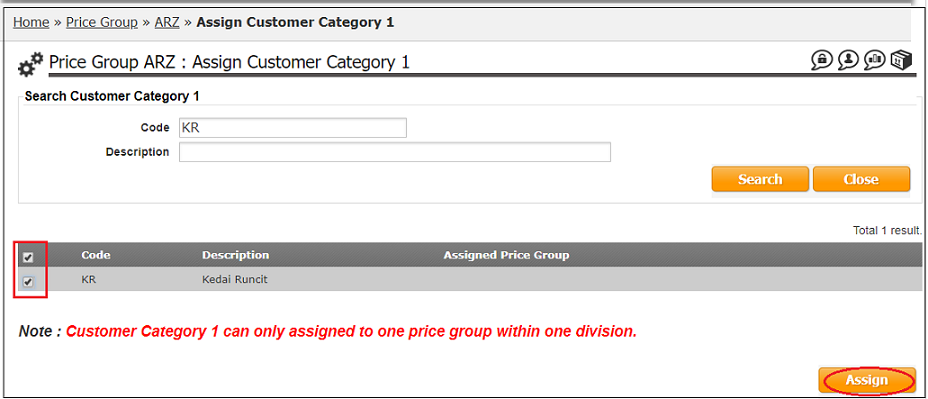
Message “Customers category assigned…”
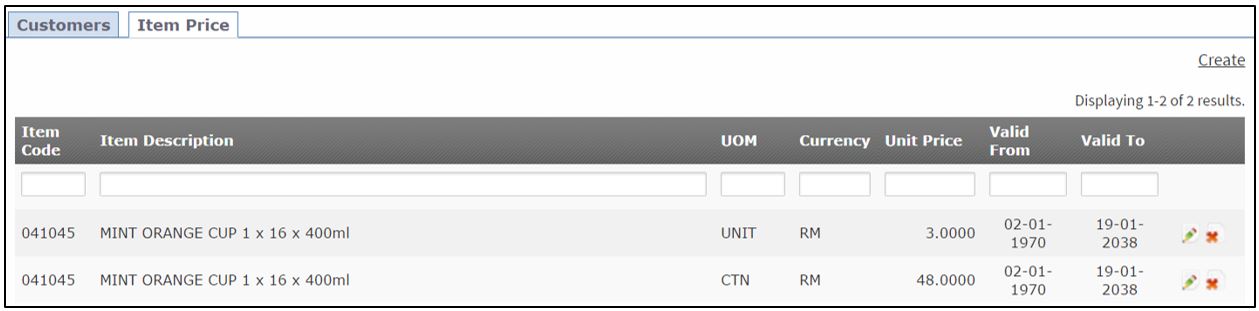
Assign Items to Price Group
Under Item Price section, click Create.

Search item.
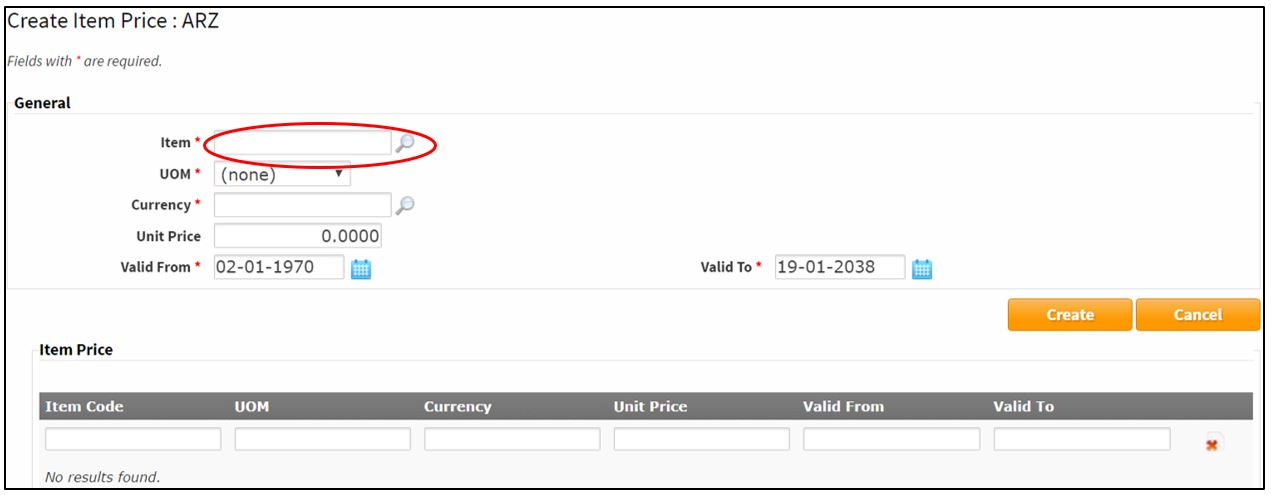
Select the UOM and fill in the new Unit Price.
Click Create button.
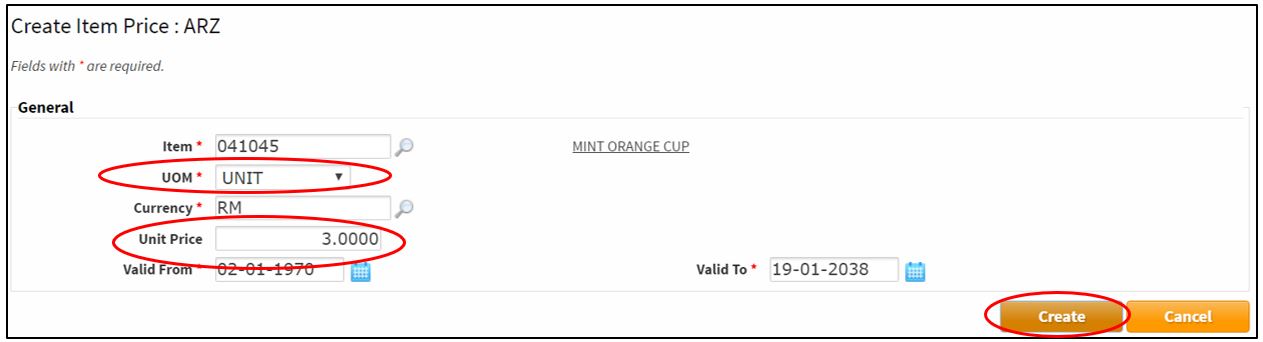
Check the item price.
click here to close
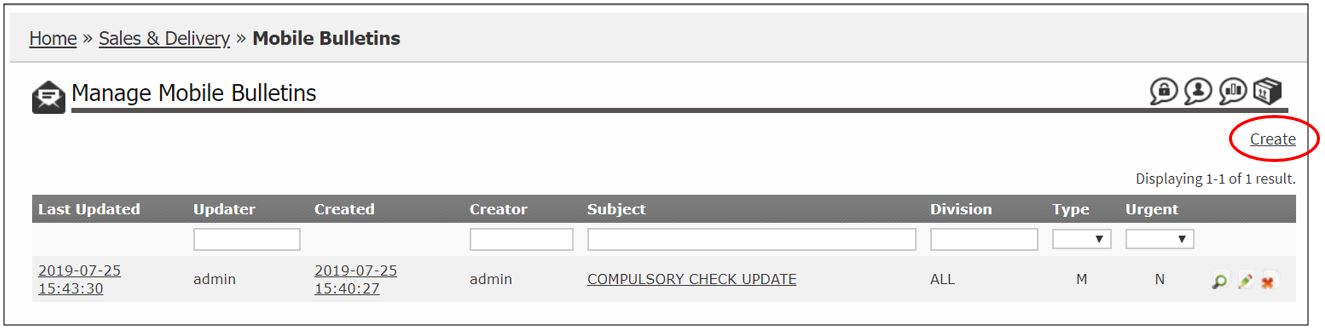
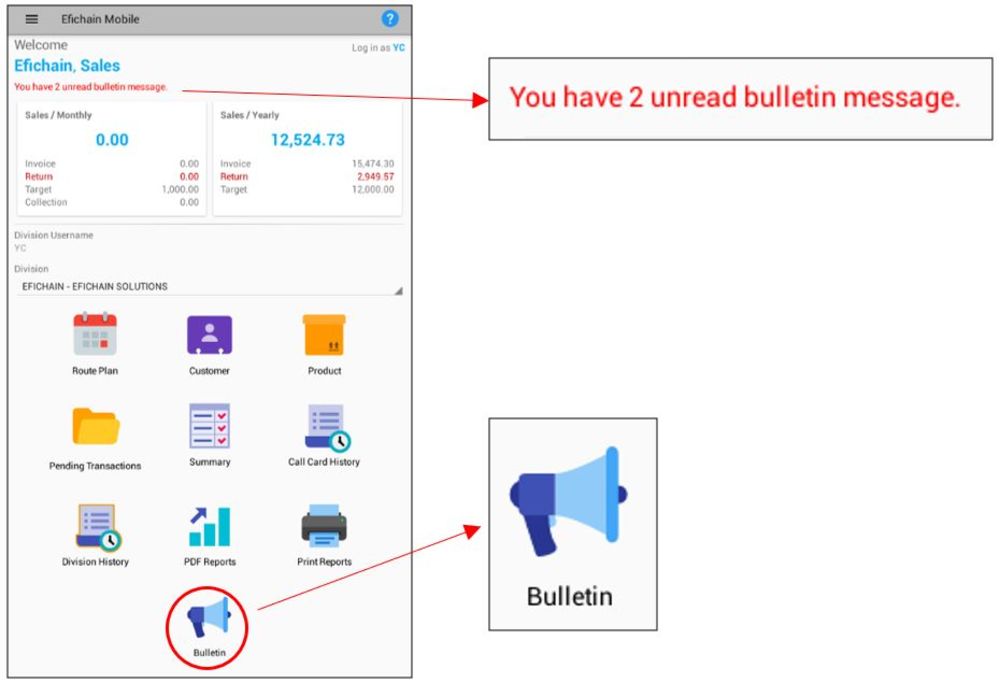
Bulletin
A message board to share news or anything with the salesman.

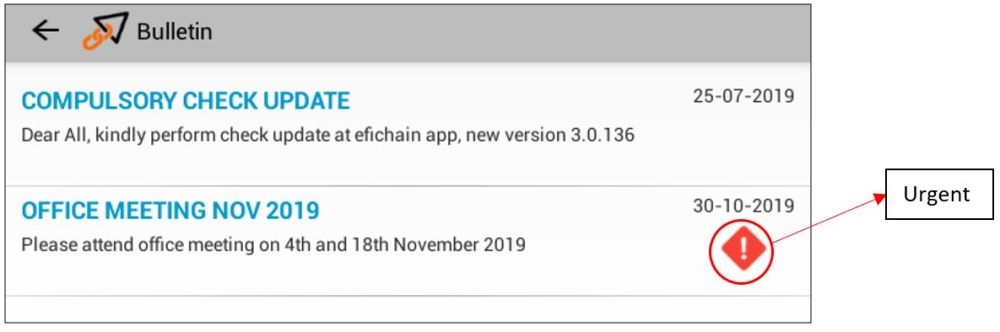
Setup Bulletin
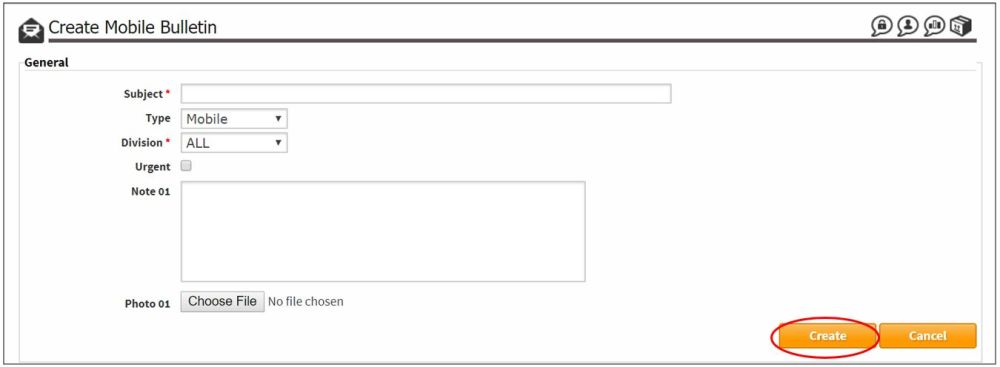
Click Create.
Fill in the Subject – Message Header.
Urgent – Tick the box if Urgent Attention required.
Note 01 – Fill in the message.
Photo01 – Click Choose File to select the picture.
Then, click Create.
Click the Red Cross to delete the message if no longer needed.
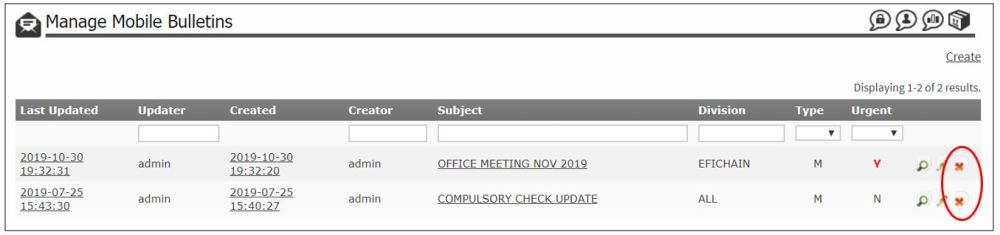
Once the salesman sync, he will have an alert about the bulletin message.
click here to close