Create Division
Division is necessary to differentiate department or branch.
Step 3, from the main page, go to Master tab and click Division.

You will be directed to Manage Division page. Click Create button to create division

In the Create Division page. Fill in the form accordingly.
Code: Division code
Default Setting
Company: Choose which company the division belong to.
Currency: Choose currency use in the system
Location: Choose the main location you created earlier for this division
Sales Bad stock: Set bad stock location for sales
Purchase bad stock : Set bad stock location for purchase
Integration Path
Import/Export Path: (Kindly contact Efichain Solutions consultant for the integration path setup).
After you are done fill up all the details, click the orange Create button.
User will see a table as below show at bottom page. User need to assign items, customers, vendors, users and locations to complete a division creation.
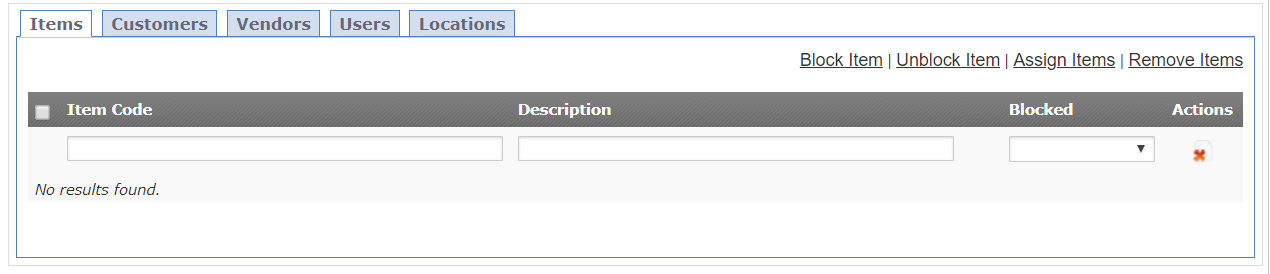
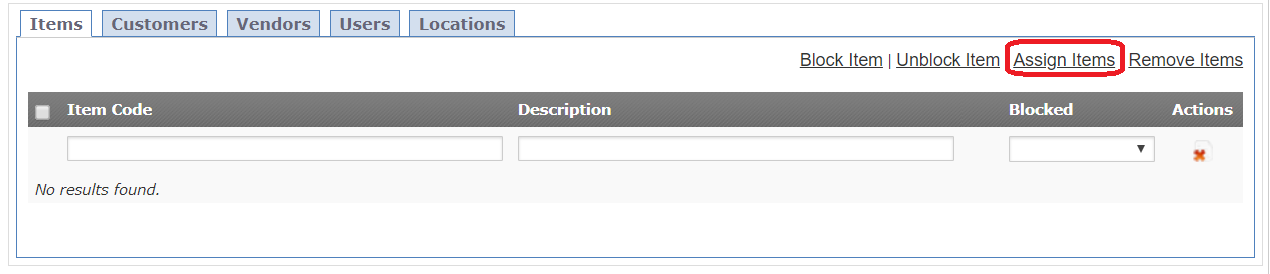
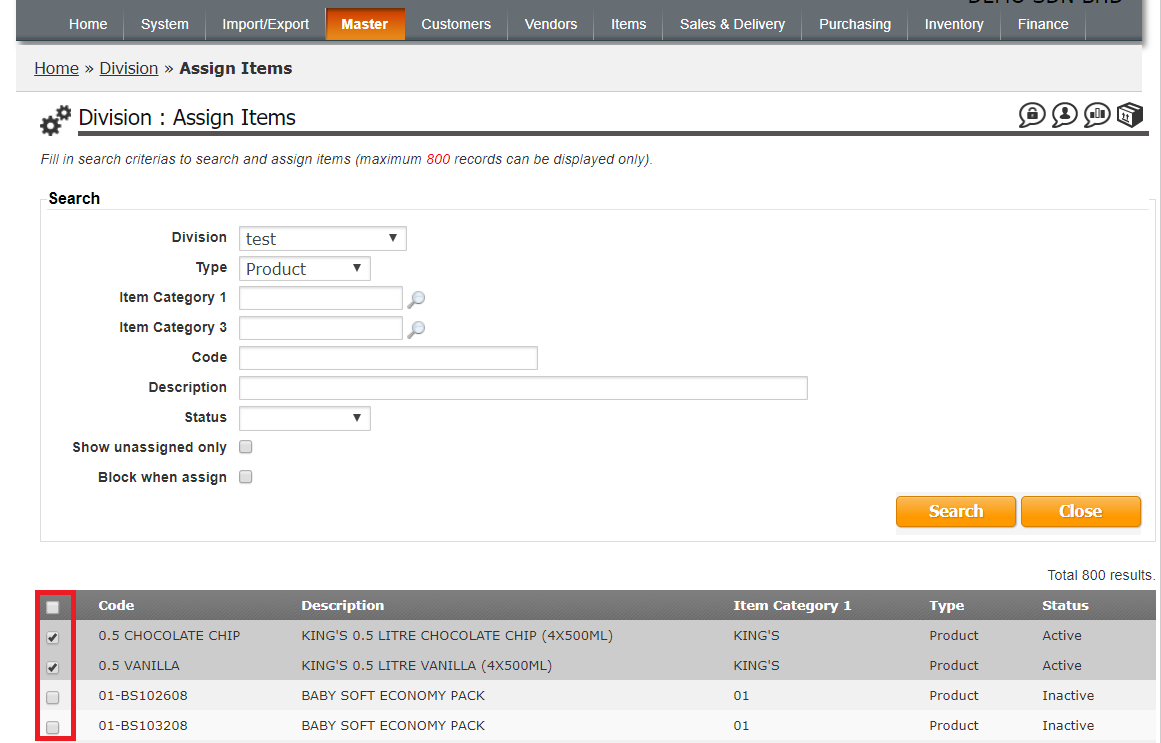
Assign Items
- Click Assign Items
2. Select division and type, click Search
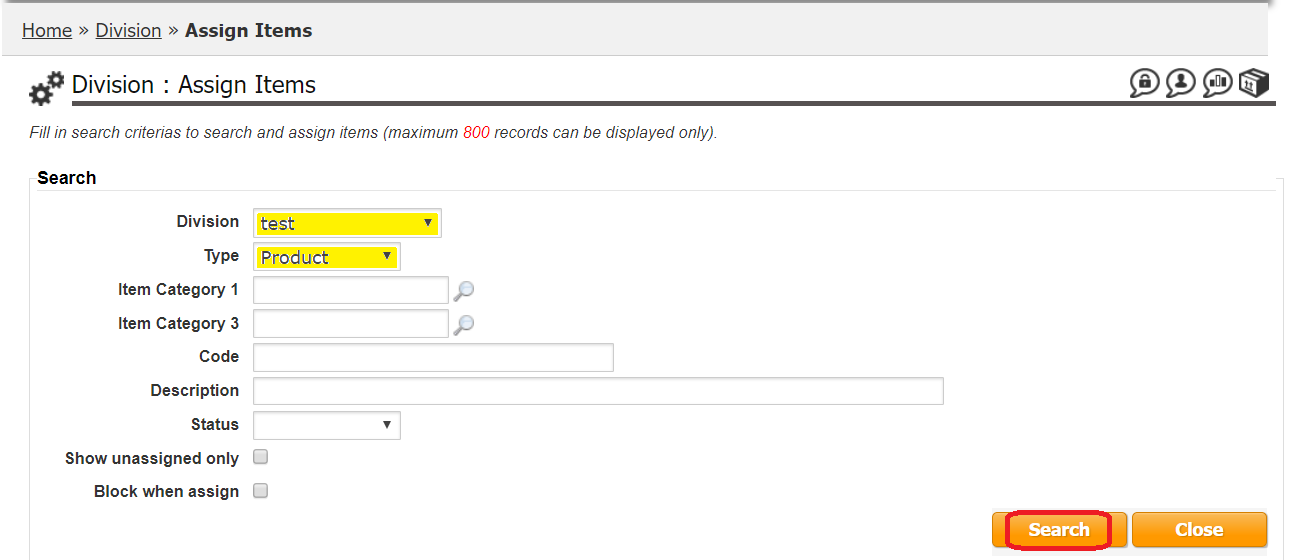
3. A list of search result will show after click Search button. Tick at the box to select items to assign under this division.
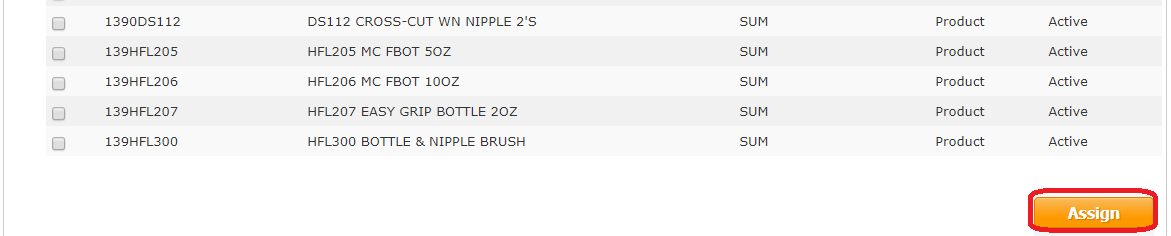
4. After done select all items to assign, scroll down to the bottom page, click Assign.
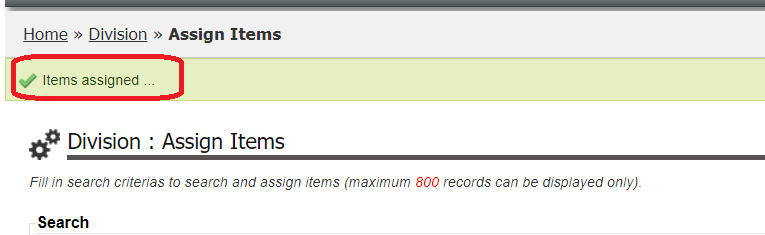
5. System will show a message at top of page when items assigned successfully.
6. Click  and back to the main page of create division.
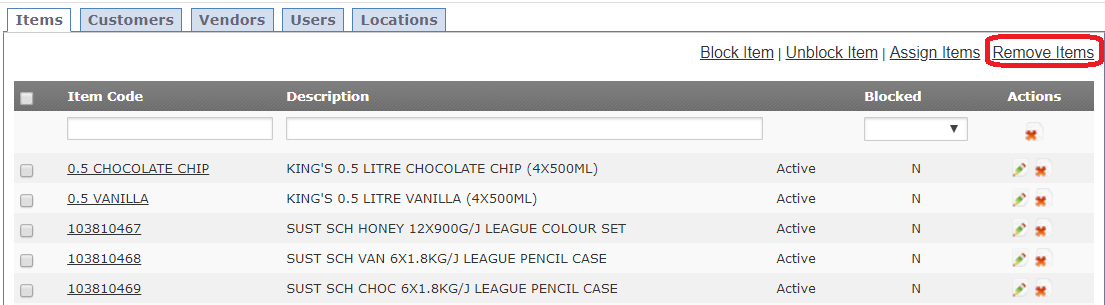
Remove Items
Remove item can be done in 2 ways.
Option 1: Click  to remove item 1 by 1.
Option 2: Click at Remove Items
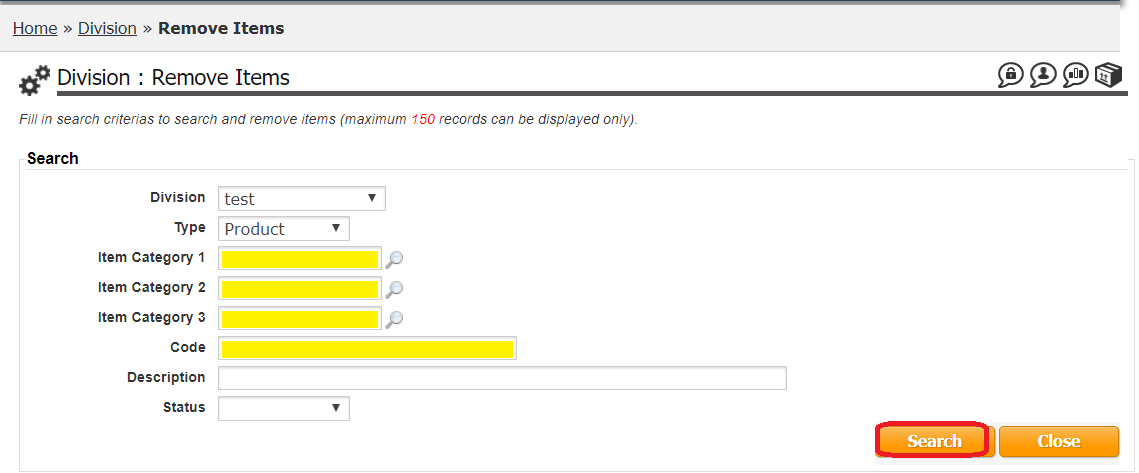
User can click to select Item Category 1, Category 2, Category 3, code and etc to help on items filtering for searching.
Tick to select items, then click Remove to remove the items
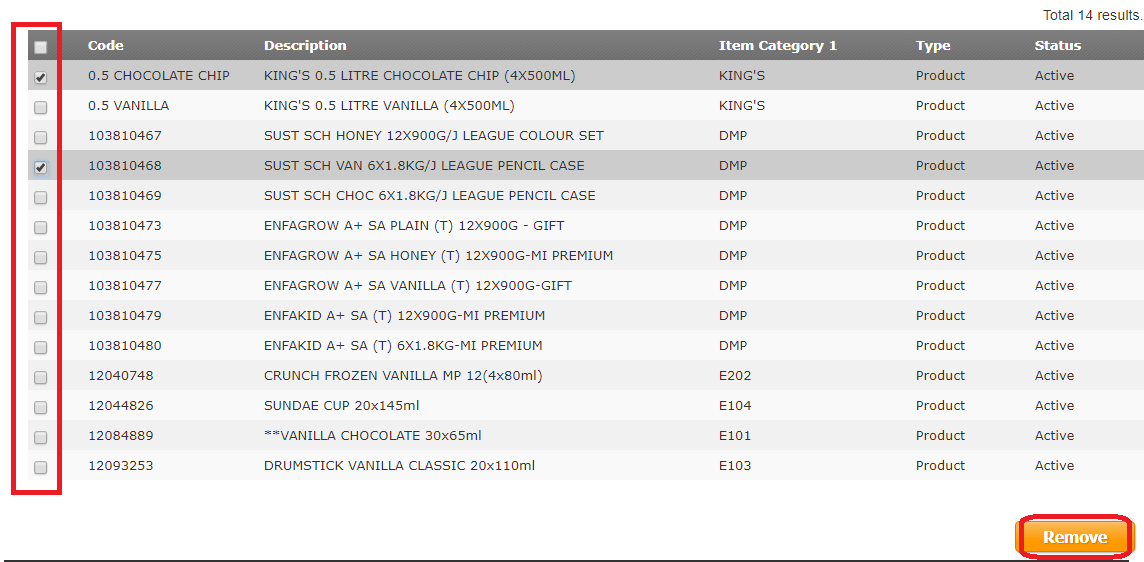
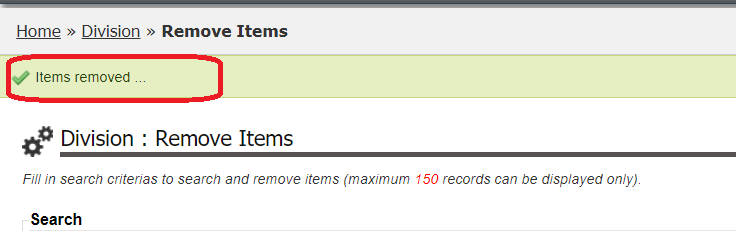
System will show a message at top of page when items removed successfully.
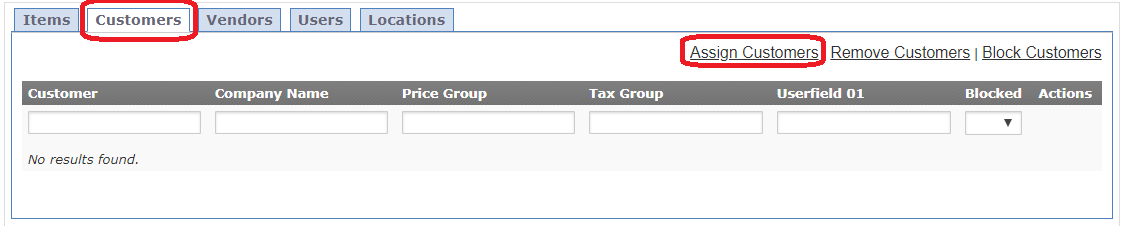
Assign Customers
At Customer tab, click Assign Customers
User can select division, key in code , ref code and etc to help on searching.
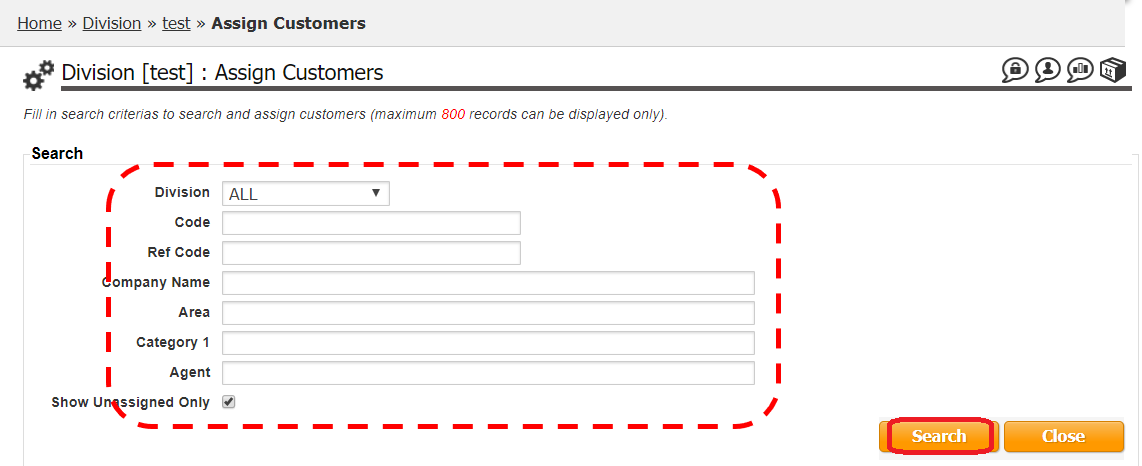
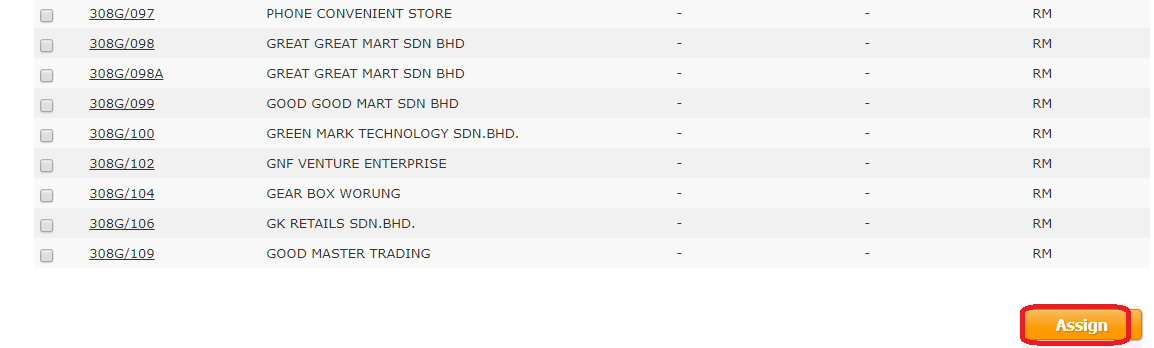
A list of search result will show after click Search button. Tick at the box to select customers to assign under this division.
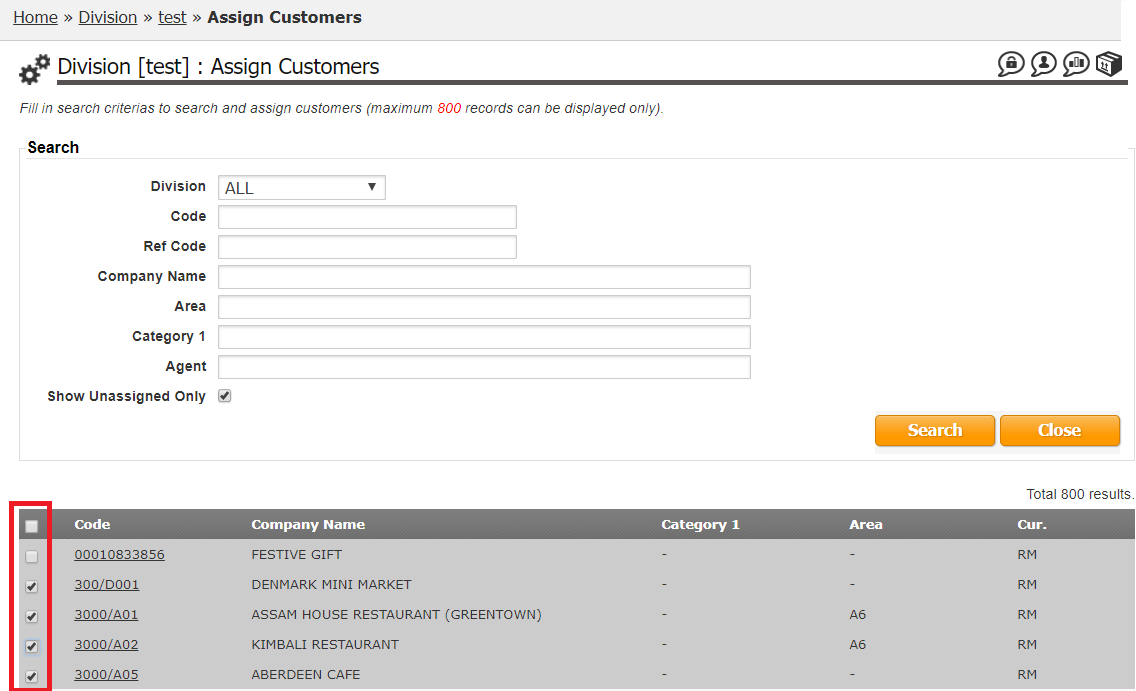
After done select all customer to assign, scroll down to the bottom page, click Assign.
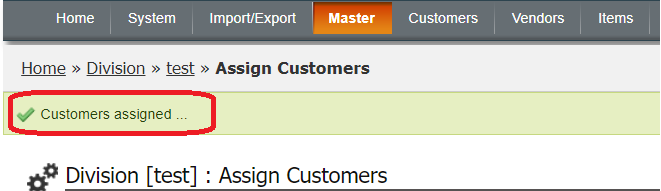
System will show a message at top of page when customers assigned successfully.
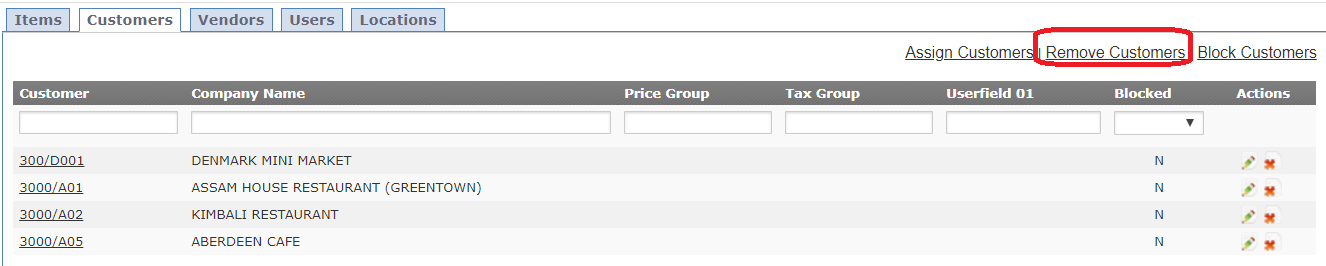
Remove Customers
Same as remove items, remove customers also can be done in 2 ways.
Option 1: Click to remove item 1 by 1.
Option 2: Click at Remove Customers
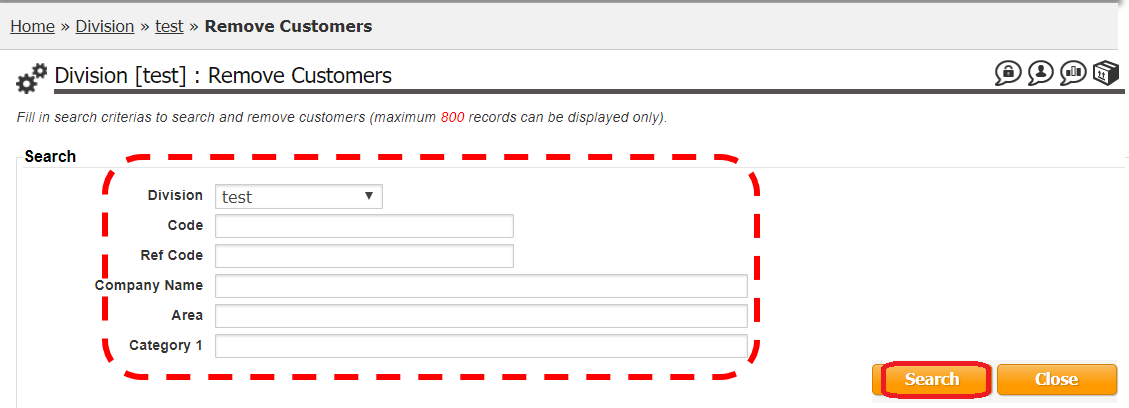
User can select division, key in code , ref code and etc to help on searching.
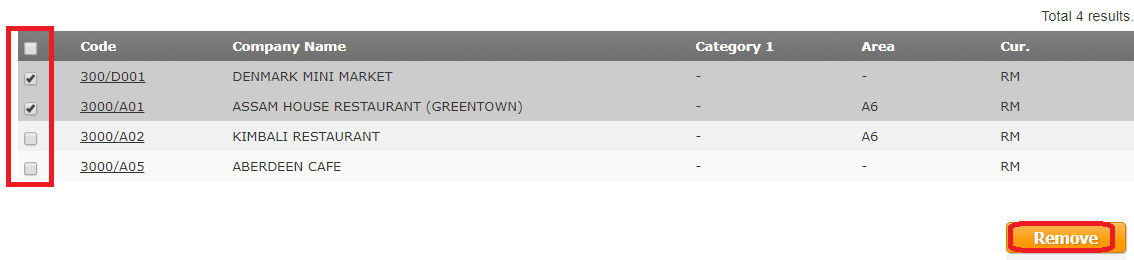
Tick to select customer, then click Remove to remove the customers.
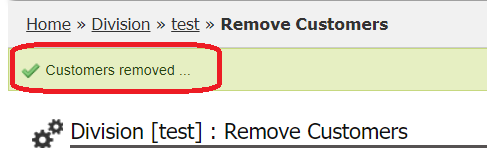
System will show a message at top of page when customers removed successfully.
Click and back to the main page of create division.
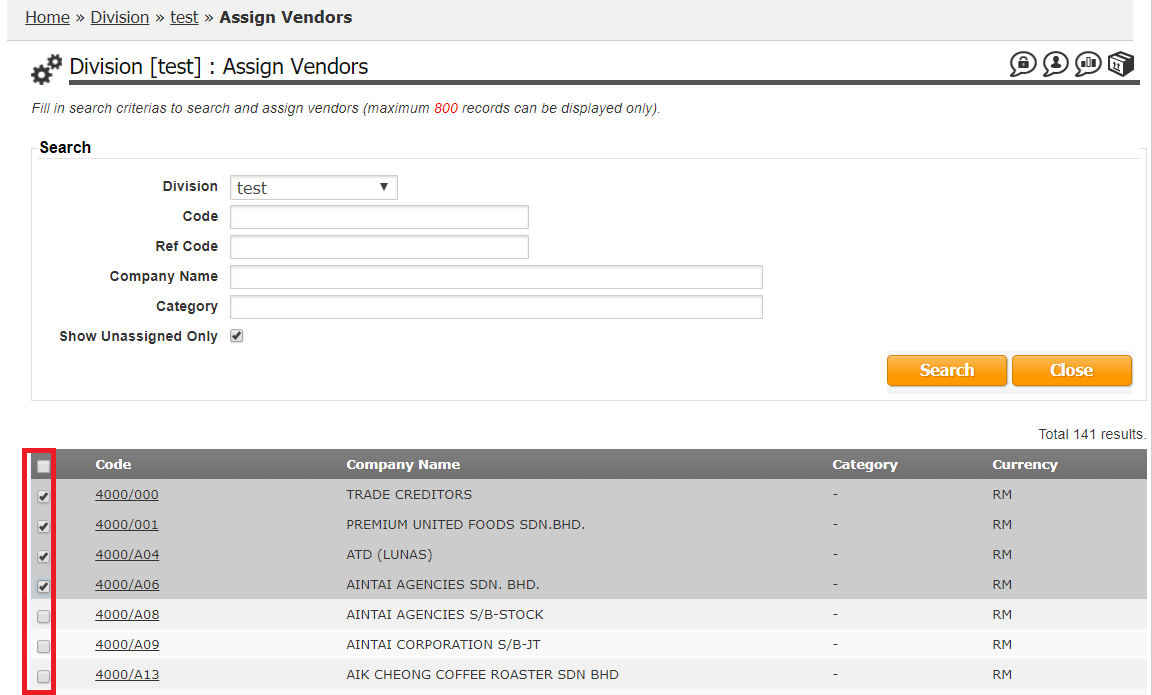
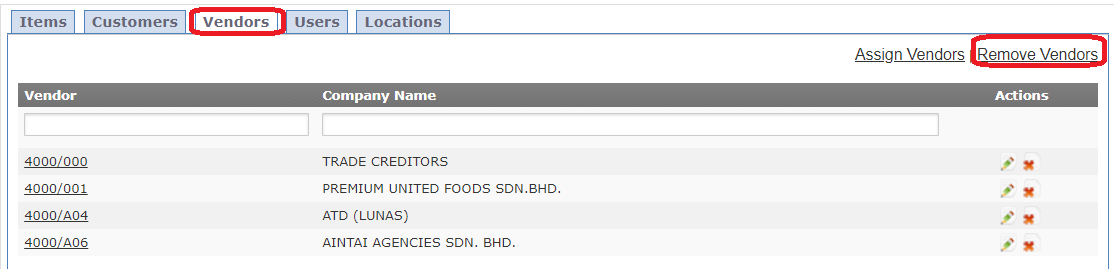
Assign Vendors
At Vendors tab, click Assign Vendors .

User can select division, key in code , ref code and etc to help on searching.

A list of search result will show after click Search button. Tick at the box to select vendors to assign under this division.
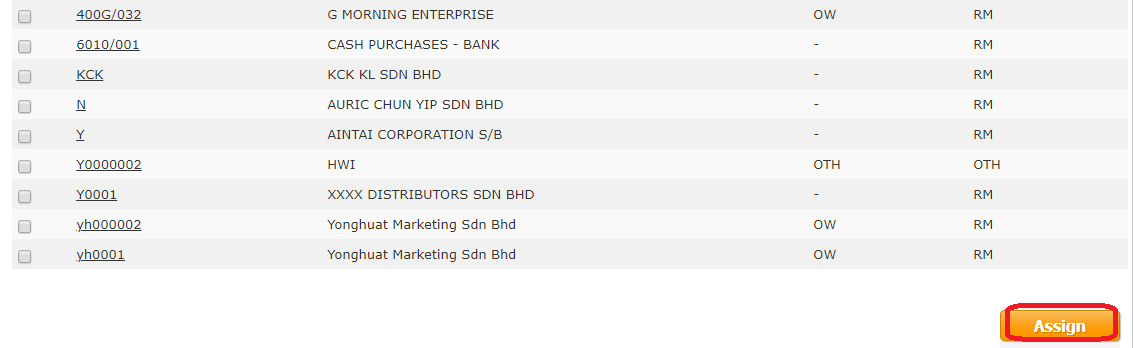
After done select all vendor to assign, scroll down to the bottom page, click Assign.
System will show a message at top of page when vendors assigned successfully.
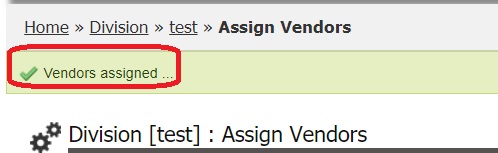
Click and back to the main page of create division.
Remove Vendors
Remove vendors also can be done in 2 ways.
Option 1: Click to remove item 1 by 1.
Option 2: Click at Remove Vendors
User can select division, key in code , ref code and etc to help on searching.
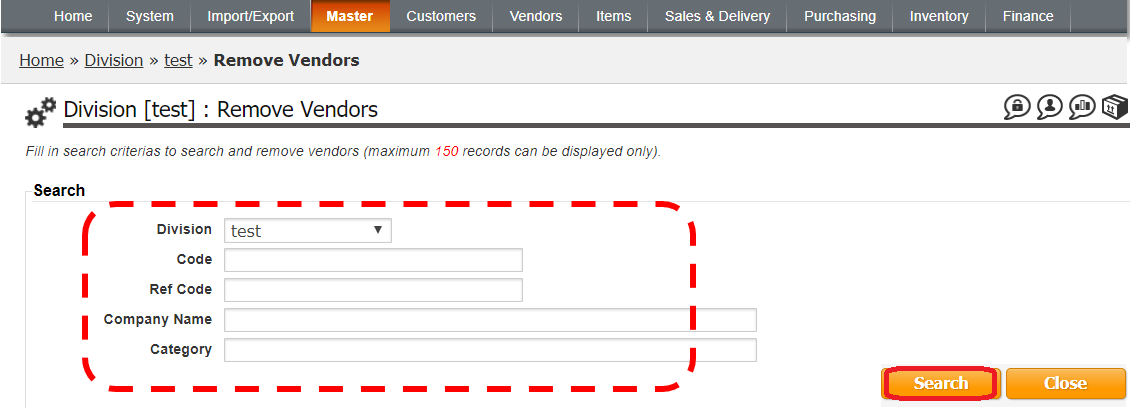
Tick to select vendor, then click Remove to remove the vendors.
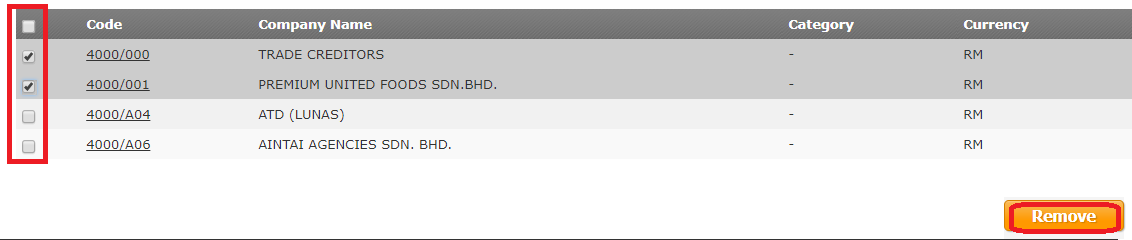
System will show a message at top of page when vendors removed successfully.

Click and back to the main page of create division.
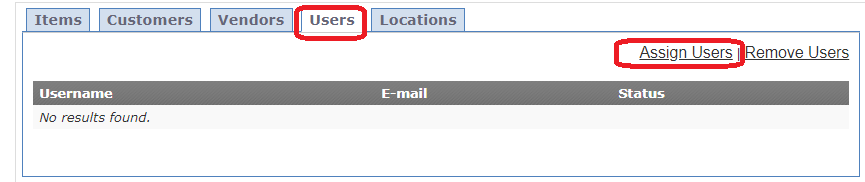
Assign Users
At Users tab, click Assign Users
User can select division, key in username to help on searching.
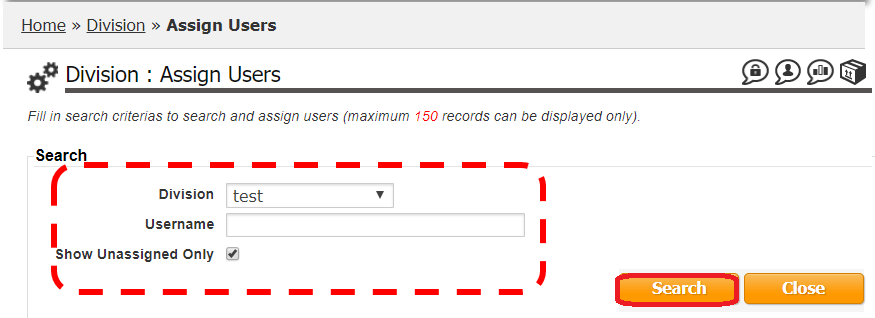
Tick to select user, then click assign to assign users.
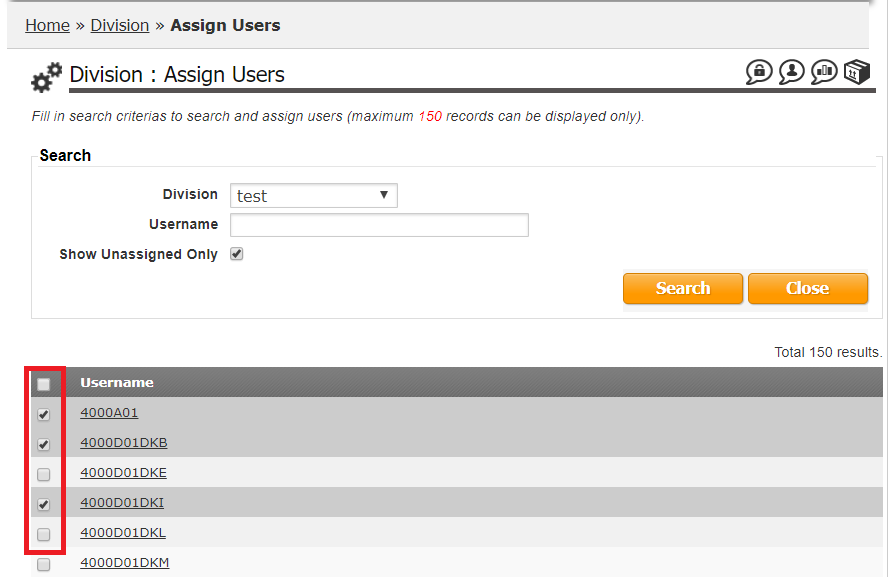
After done select all user to assign, scroll down to the bottom page, click Assign.
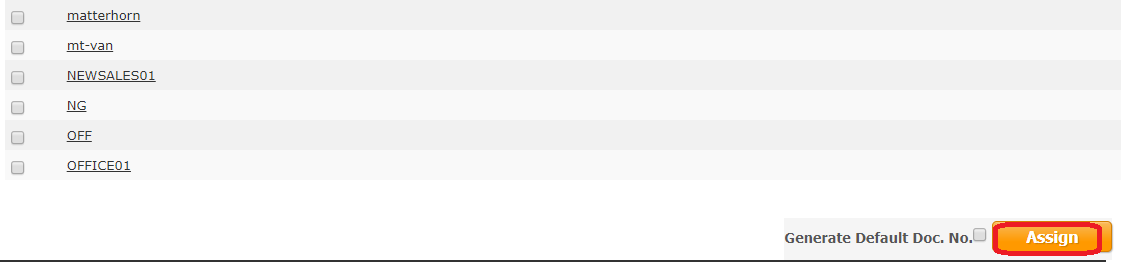
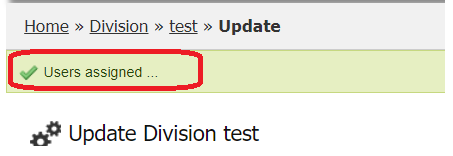
System will show a message at top of page when users assigned successfully.
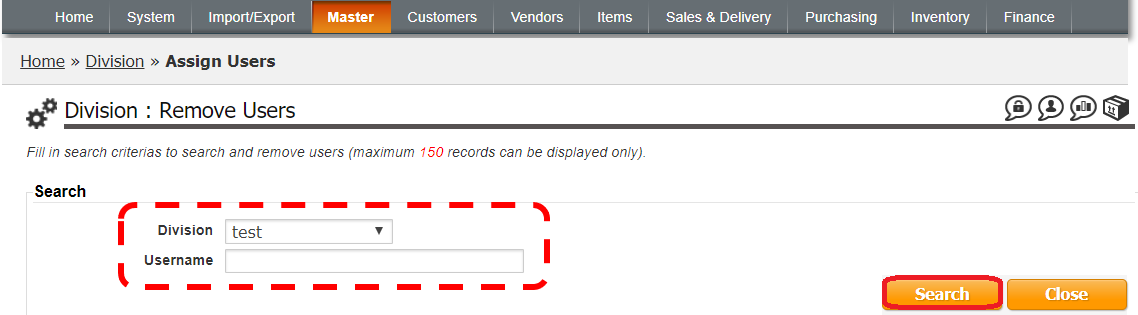
Remove Users
At Users tab, click Remove Users
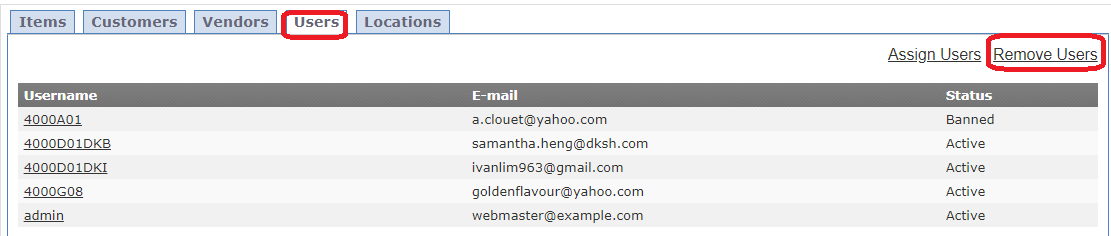
User can select division, key in username to help on searching.
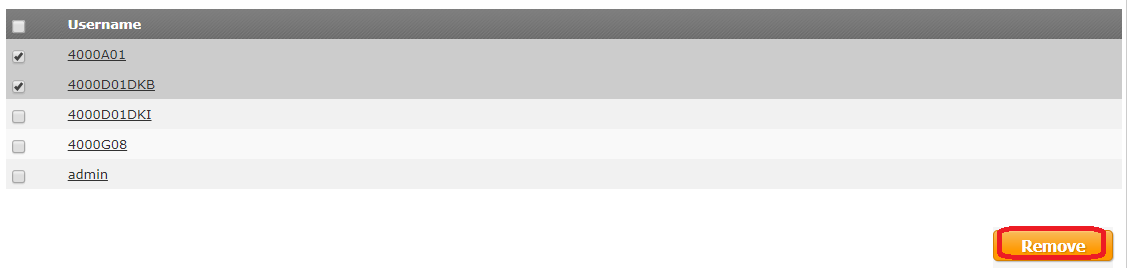
Tick to select user.
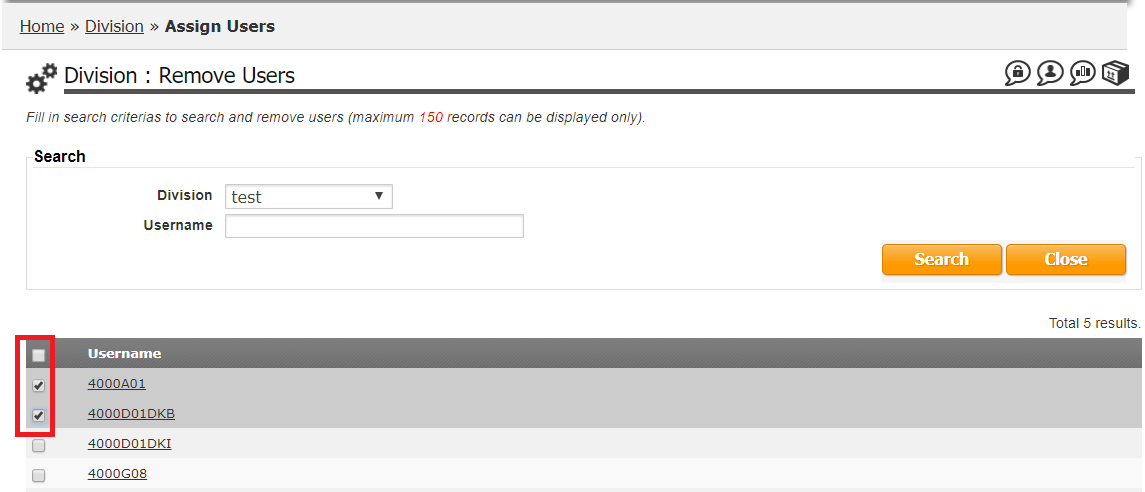
Scroll down to bottom page and click Remove to remove users
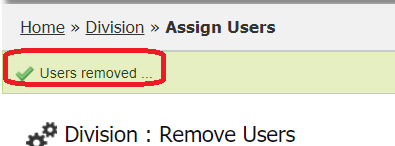
System will show a message at top of page users removed successfully.
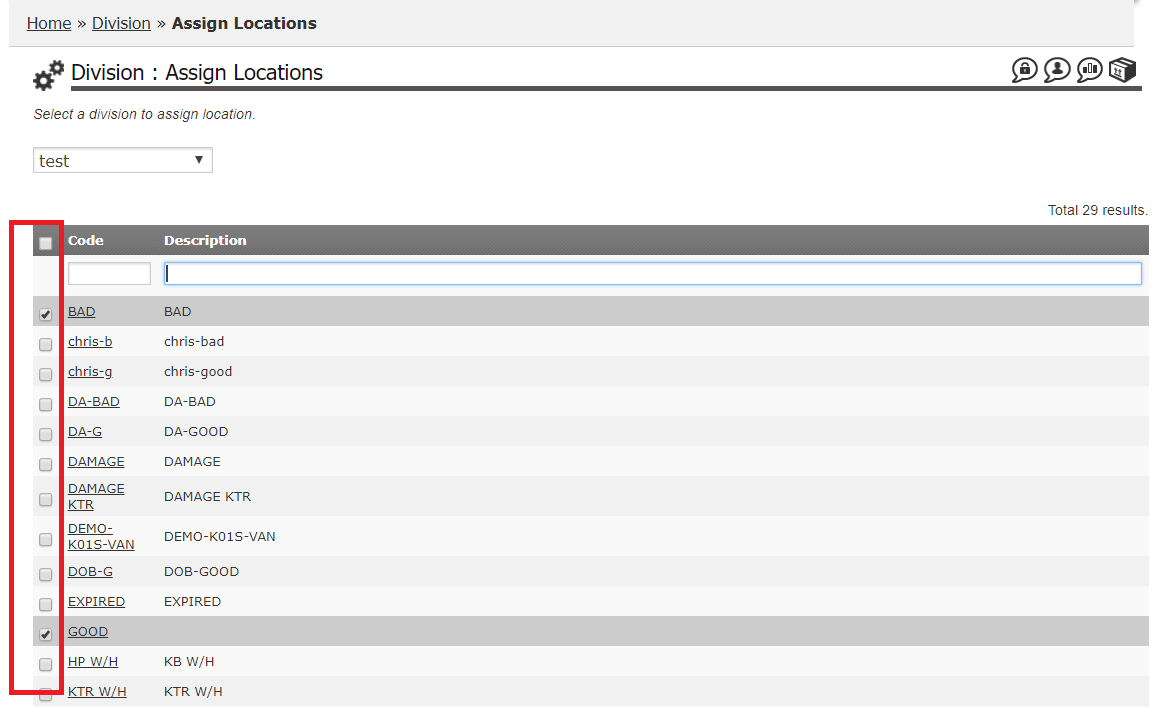
Assign Locations
At Locations tab, click Assign Location

Tick to select location to assign.
Scroll down to bottom page, click Assign when done select location to assign to division.
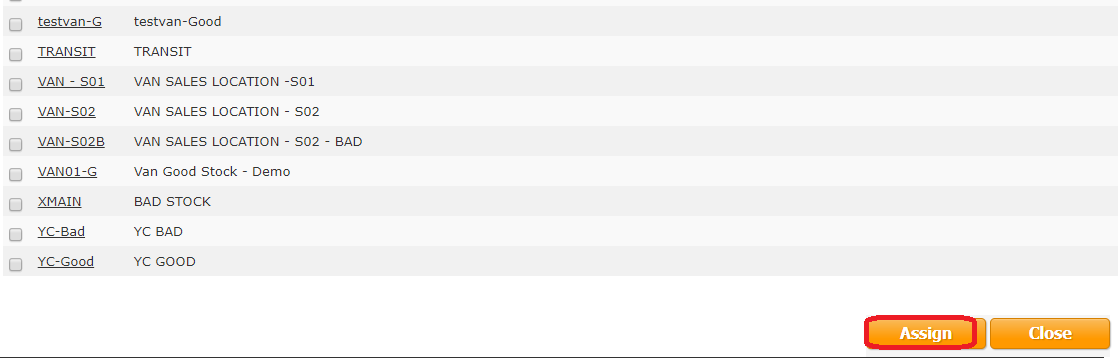
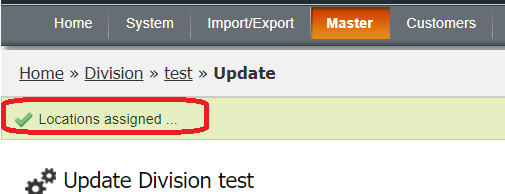
System will show a message at top of page locations assigned successfully.
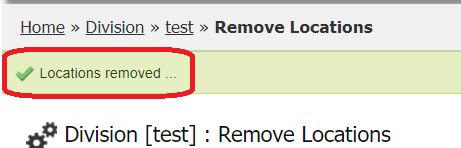
Remove Location
At Locations tab, click Remove Location

User can select division, key code / description to help on searching.
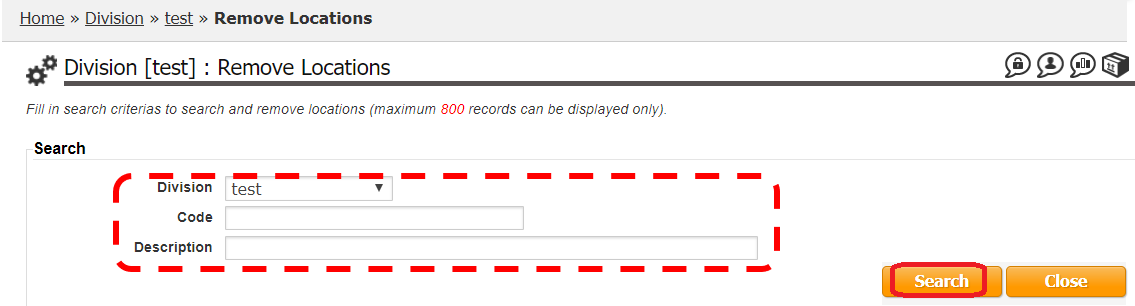
Select location, and click Remove to remove locations

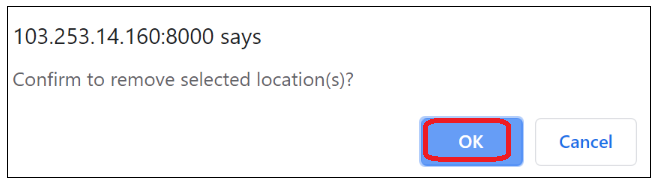
Click OK to confirm remove locations
System will show a message at top of page locations removed successfully.